-
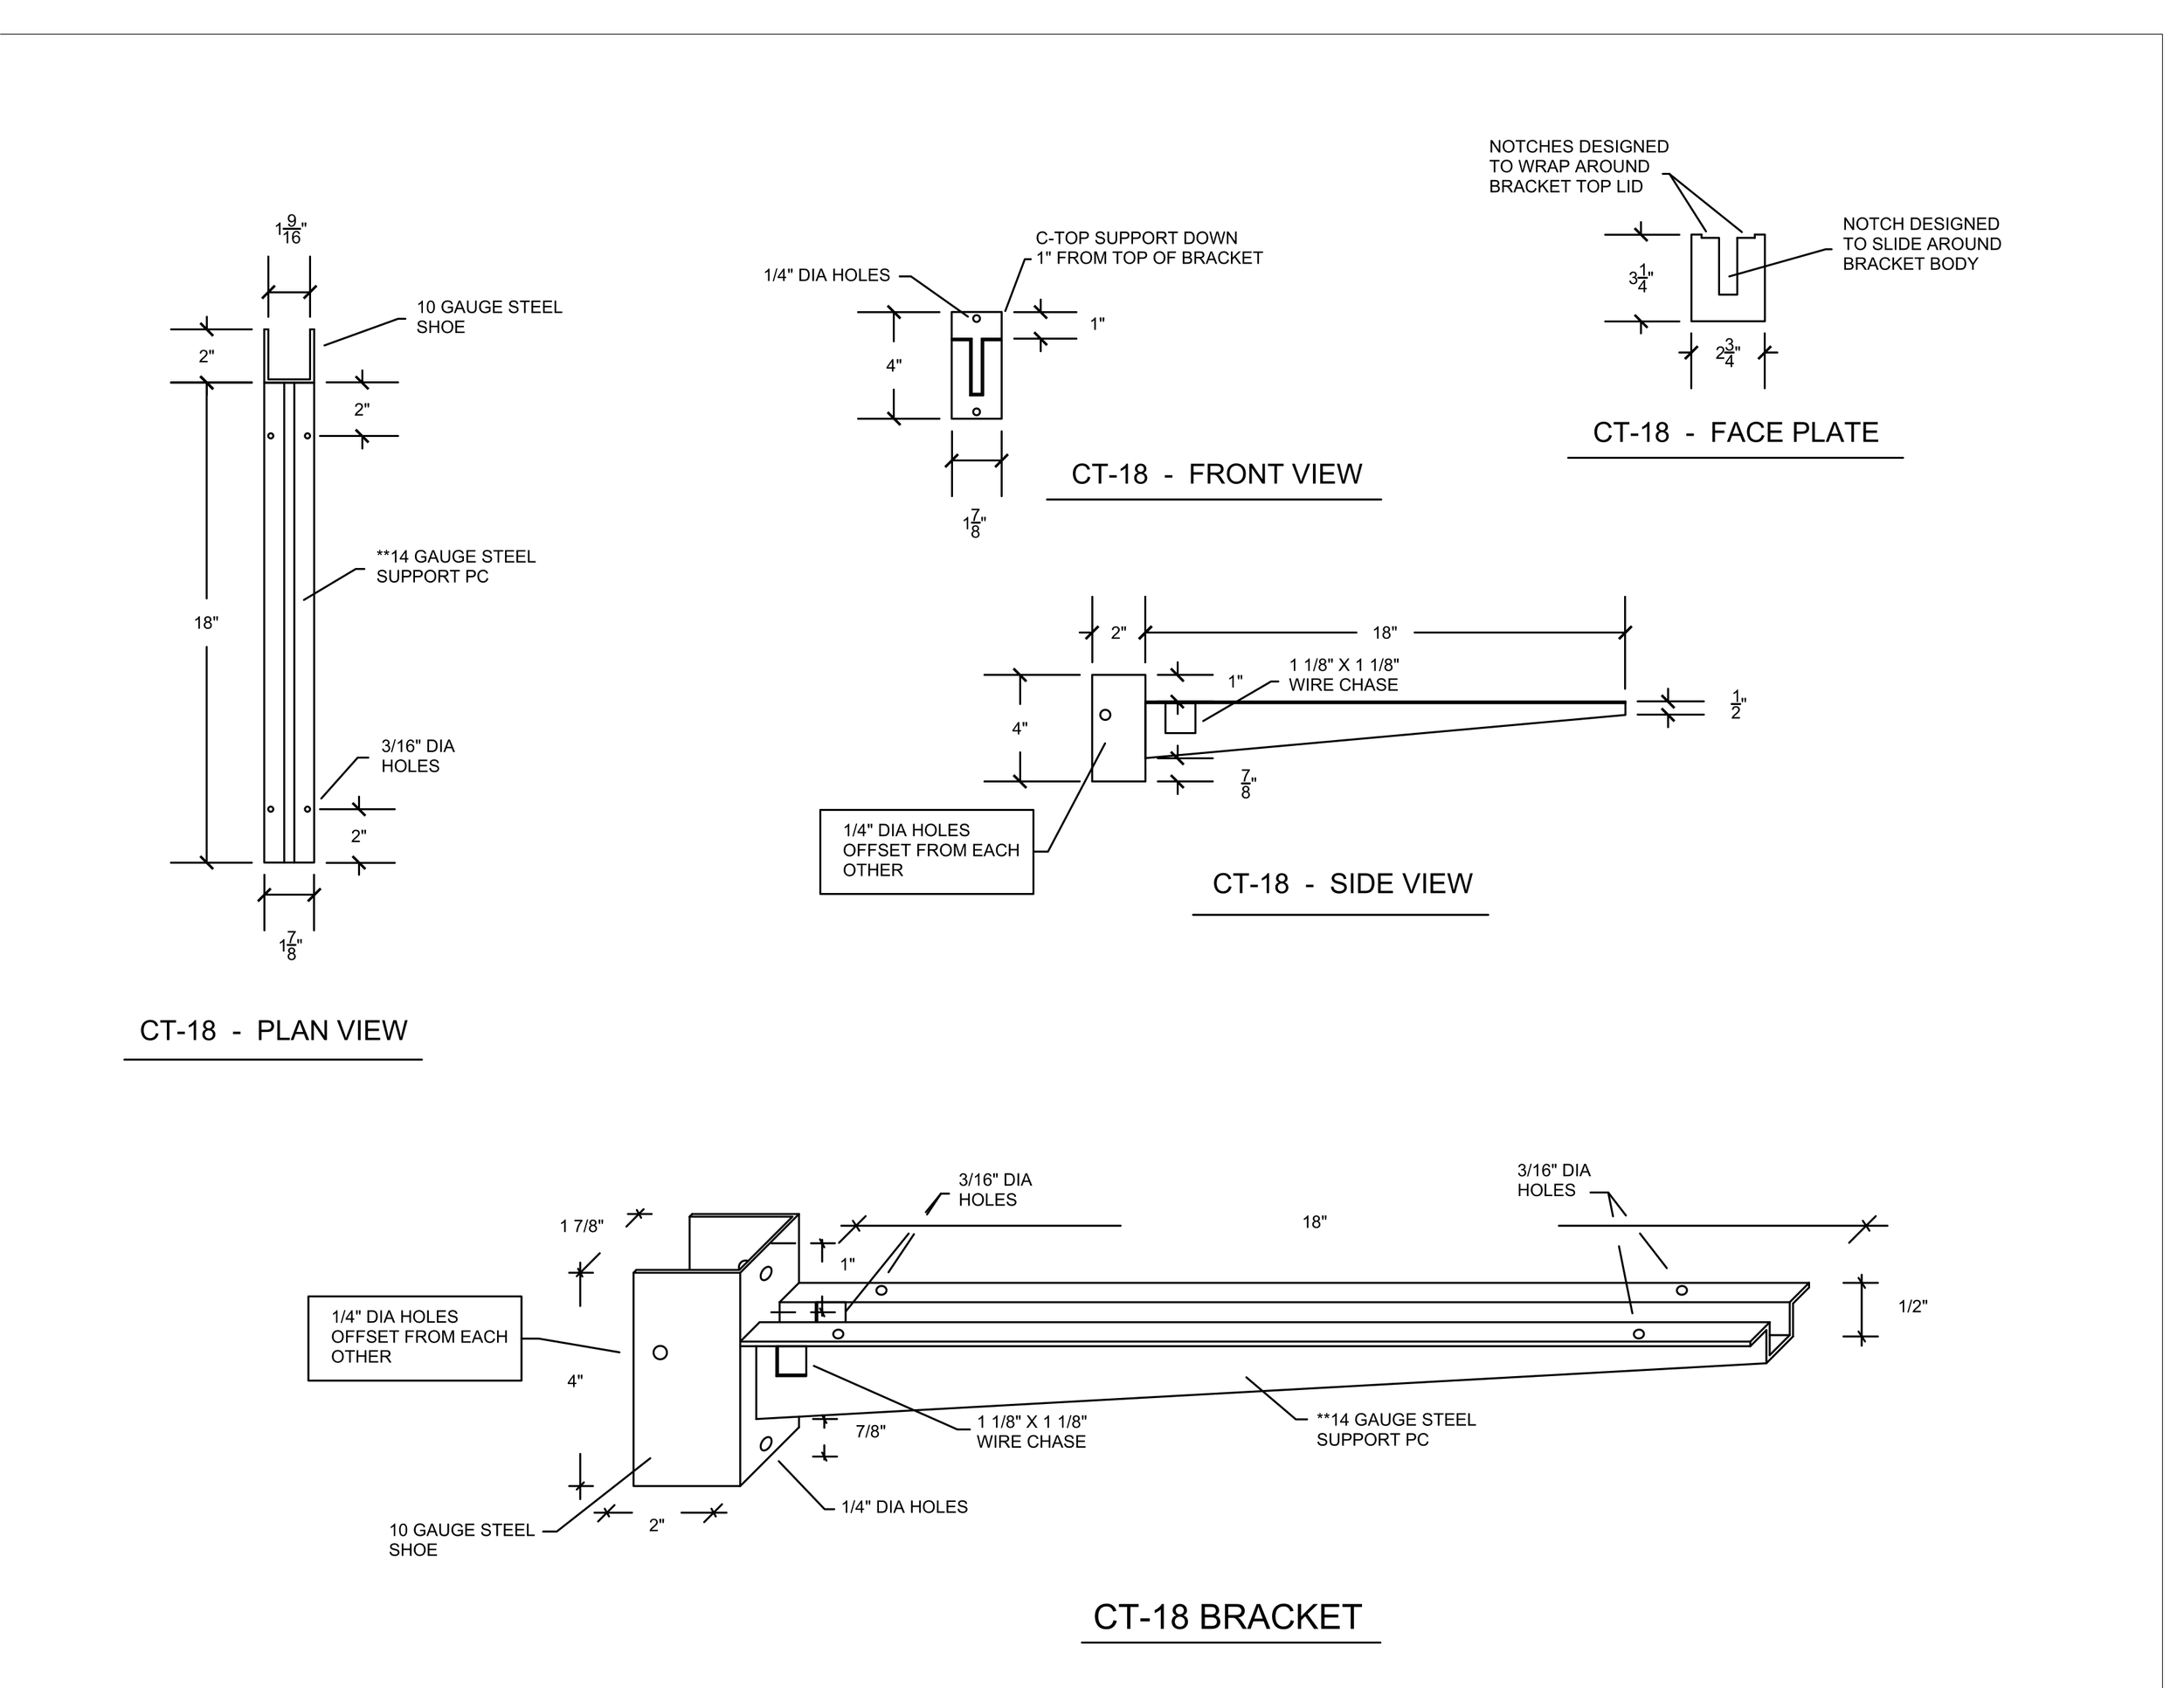
Step 1: Determine where the bottom of the countertop meets the top of the bracket. Mark the wall with a horizontal line.
Step 2: Locate and mark both ends of the studs. We have found that an electronic stud finder works best.
Step 3: Measure and mark for 2” by 4” holes by starting 1 1/8” above your horizontal line marked in step 1. This will be the top of the hole. Make sure these marks are also centered over the stud(s). You can utilize the shoe of your bracket to outline where you are going to cut.
Step 4: Use a sheetrock saw or an oscillating saw to cut out the sheetrock. Don’t worry if you’re slightly off the stud from left to right, you can widen the hole to fit the bracket. Your countertop will cover everything above the bracket.
Step 5: Place the bracket onto the stud through the 2” by 4” hole. We recommend using the provided 1/4” lag screws.
Step 6: Using the holes on top and bottom, screw the bracket into the stud until snug. By tightening the top or bottom screw you can level the bracket.
Included with the bracket is also our Wall Cover. The Wall Cover can be used to cover the bottom half of the hole in the sheetrock, as your countertop will cover the top.
In the event a screw breaks, or for extra support, cut the sheetrock to the left and/or right of the hole and utilize the holes on the sides to secure the bracket.
Our brackets are designed to hold up to 350lbs each. Also be sure to secure your cabinet to the wall, rather than just setting it on the brackets.