-
Step 1: Determine where you want the top and bottom of your wall panel to be and mark the wall with horizontal lines.
Step 2: Locate and mark both sides of the studs. We have found that an electronic stud finder works best.
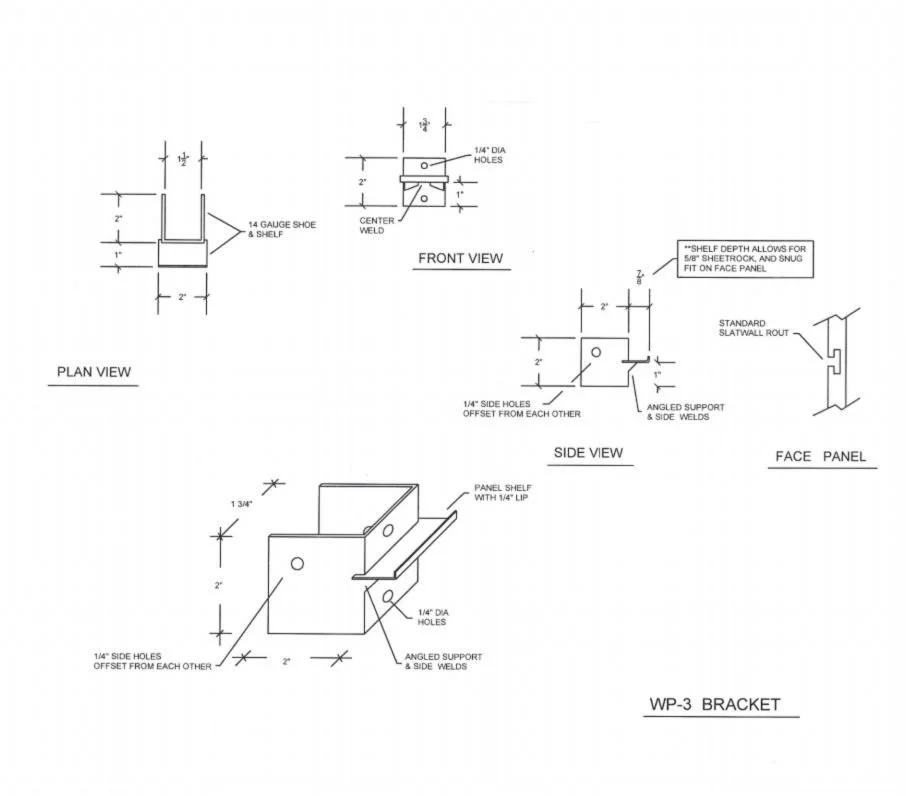
Step 3: Route the back of your wall panel with a slatwall routing bit. We recommend approximately 4” – 6” from top and bottom edges for panels that require four brackets.
*Two brackets will support the weight of most panels up to 5’x10’. However, for larger panels we recommend four brackets (one toward each corner) to keep the panel snug to the wall.
Step 4: To determine the height location of your bracket, factor in 15/16” for the space from the top of the shoe of the bracket to the panel shelf rest part of the bracket, which is where the slatwall route will rest on the bracket. Mark the wall accordingly.
Step 5: Mark for the 2”x2” hole by using your marks from Step 4 and centering them over the studs marked in Step 2.
Step 6: Use a sheetrock saw or an oscillating saw to cut out the sheetrock. Don’t worry if you’re slightly off the stud from left to right, you can widen the hole to fit the bracket and it will be covered by your wall panel.
Step 7: Place the bracket onto the stud through the 2” x 2” hole. We recommend using the provided 3/16” lag screw.
Step 8: Using the holes on top and bottom, screw the bracket into the stud until snug.
In the event a screw breaks, or for extra support, cut the sheetrock to the left and/or right of the hole and utilize the holes on the sides to secure the bracket.
Our brackets are designed to hold up to 150lbs each.
When installed correctly, your wall panel should be touching the wall. Using construction adhesive to glue the panel to the wall once pushed snug onto the bracket will eliminate the need for face nailing.