-
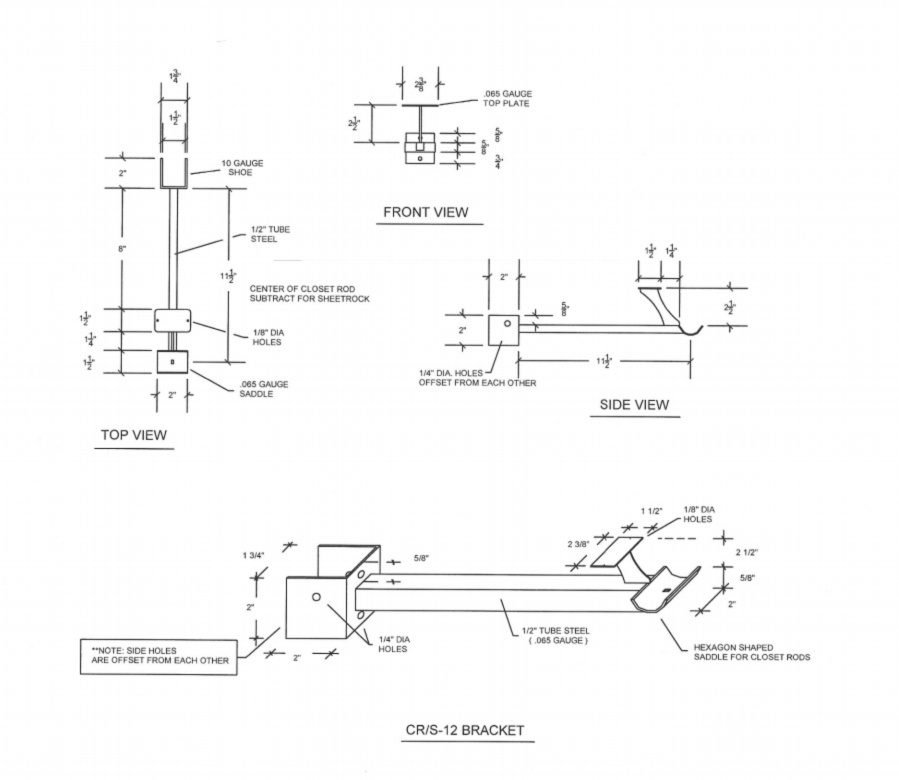
Step 1: Determine where you want the top of your closet rod to be on the wall and mark it with a horizontal line. This will be approximately where the top of the hole you will cut into the sheetrock is. Depending on the diameter of closet rod you use, it will vary.
Step 2: Locate and mark both sides of the studs. We have found that an electronic stud finder works best.
Step 3: Measure and mark for 2” x 2” holes by marking 2” below the mark made in Step1. This will be the bottom of the hole. Make sure this mark is also centered over your stud(s). You can utilize the shoe of your bracket to outline where you are going to cut.
Step 4: Use a sheetrock saw or an oscillating saw to cut out the sheetrock.
Step 5: Place the bracket onto the stud through the 2” x 2” hole. We recommend using the provided 3/16” lag screw.
Step 6: Using the holes on top and bottom, screw the bracket into the stud until snug. By tightening the top or bottom screw you can level the bracket.
Included with this bracket is a 2-piece Wall Cover. Remove the paper from the tape on the back and stick it to the wall around the bracket, to cover the hole in the sheetrock and give it a nice, finished look. We recommend using a dab of silicone as well to keep the Wall Cover from coming off.
In the event a screw breaks, or for extra support, cut the sheetrock to the left and/or right of the hole and utilize the holes on the sides to secure the bracket. In doing this, you will have to patch your wall.
This bracket is designed to hold up to 150lbs.
-
Step 1: Determine where you want the bottom of your shelf to be and mark the wall with a horizontal line. Measure down 1 7/8” and make a new mark. This new mark will be the top of your 2” x 2” hole.
Step 2: Locate and mark both sides of the studs. We’ve found that an electronic stud finder works best.
Step 3: Measure and mark for the 2” x 2” hole by marking 2” below the new mark made in Step 1. This will be the bottom of the hole. Make sure this mark is also centered over your stud(s). You can utilize the shoe of your bracket to outline where you are going to cut.
Step 4: Use a sheetrock saw or an oscillating saw to cut out the sheetrock.
Step 5: Place the bracket onto the stud through the 2” x 2” hole. We recommend using the provided 3/16” lag screw.
Step 6: Using the holes on top and bottom, screw the bracket into the stud until snug. By tightening the top or bottom screw you can level the bracket.
Included with this bracket is a 2-piece Wall Cover. Remove the paper from the tape on the back and stick it to the wall around the bracket, to cover the hole in the sheetrock and give it a nice, finished look. We recommend also adding some silicone to the back of the Wall Cover to ensure it doesn’t fall off the wall over time.
In the event a screw breaks, or for extra support, cut the sheetrock to the left and/or right of the hole and utilize the holes on the sides to secure the bracket. In doing this, you will have to patch your wall.
This bracket is designed to hold up to 150lbs each.